Jump to Topic:
Overview
The Consultant adds client requirements to a project, takes notes, and creates open items. They also can send out requirements for approval by the client.
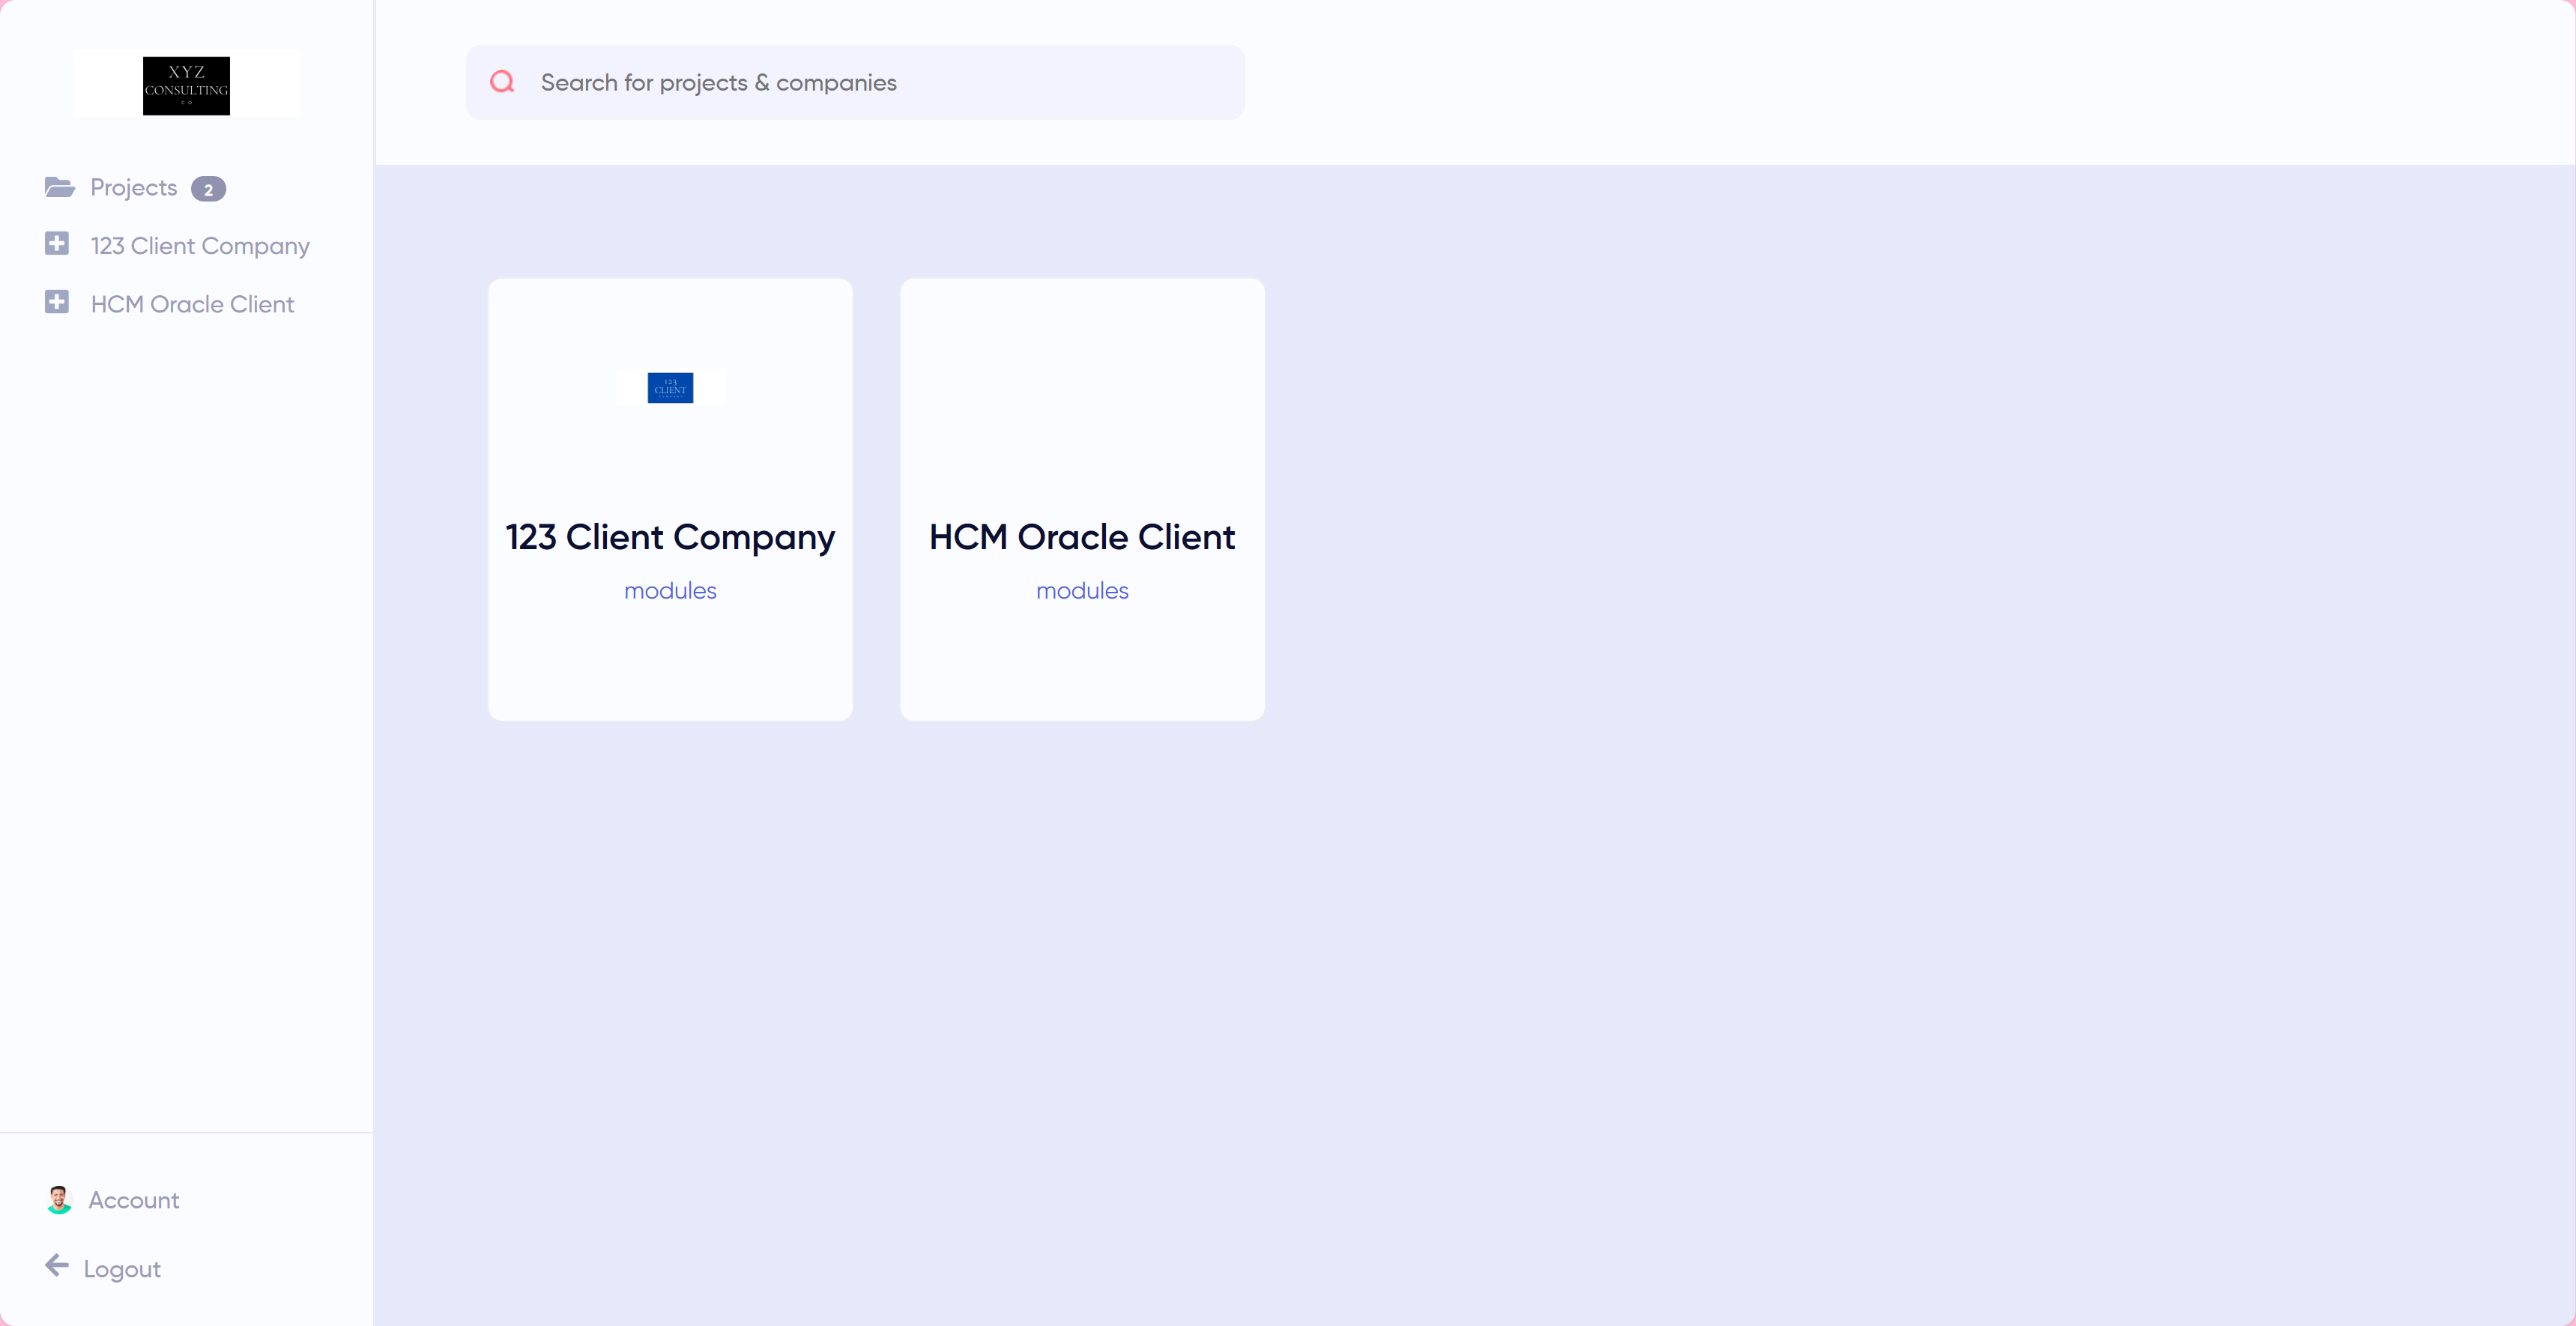
Access Projects
To access a project, a consultant must be assigned access by a project manager.
Project and Module Access
Projects assigned to a consultant will appear under “Projects” in their dashboard.

Module access can be Full or View Access. Full Access allows a consultant to create, import, edit, delete, and export project requirements. View Access allows a consultant to only view and export project requirements.
Import Requirements
To add requirements to a project module, a consultant can import requirements from a template, create requirements from scratch or import requirements using an Excel file.
Import Requirements from Template
Access to importing requirements from a template is only available when working on a module for the first time. To import requirements from a template, the template must have been created by the company Administrator and have at least one requirement. Here are the steps to add requirements using a Template:
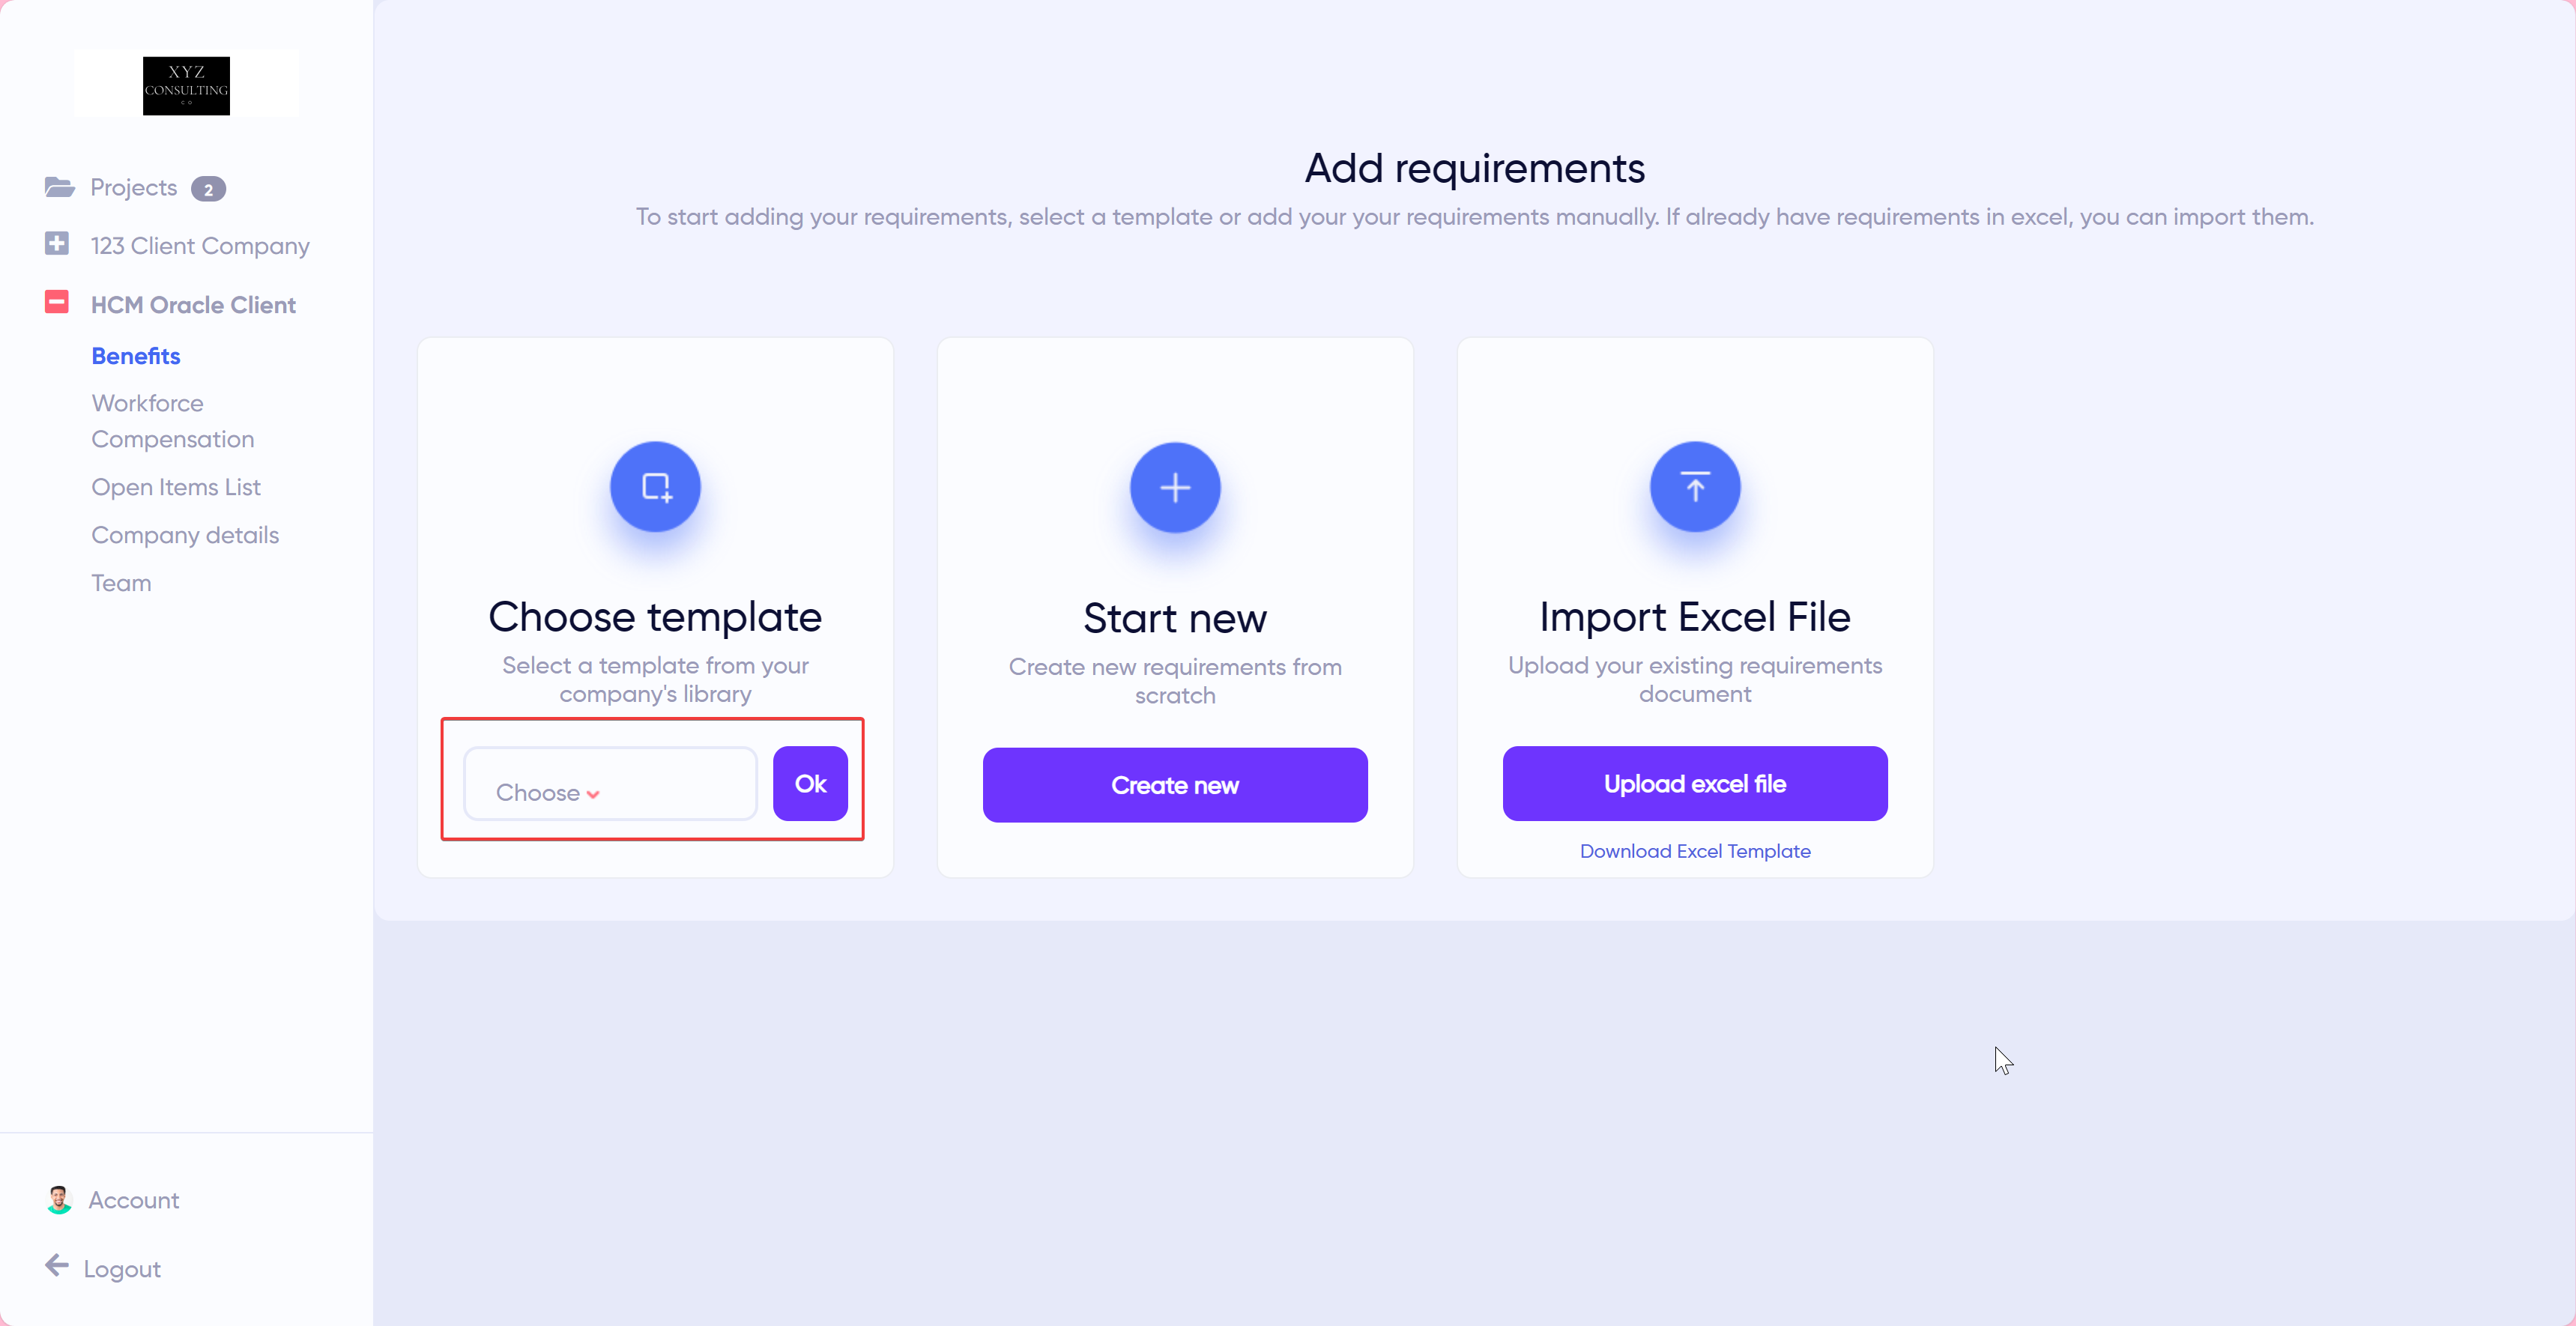
Click on a module in a project.
Under Choose Template, select a template from the dropdown. Only available templates for that module will display.
Click OK
Create Requirements from Scratch
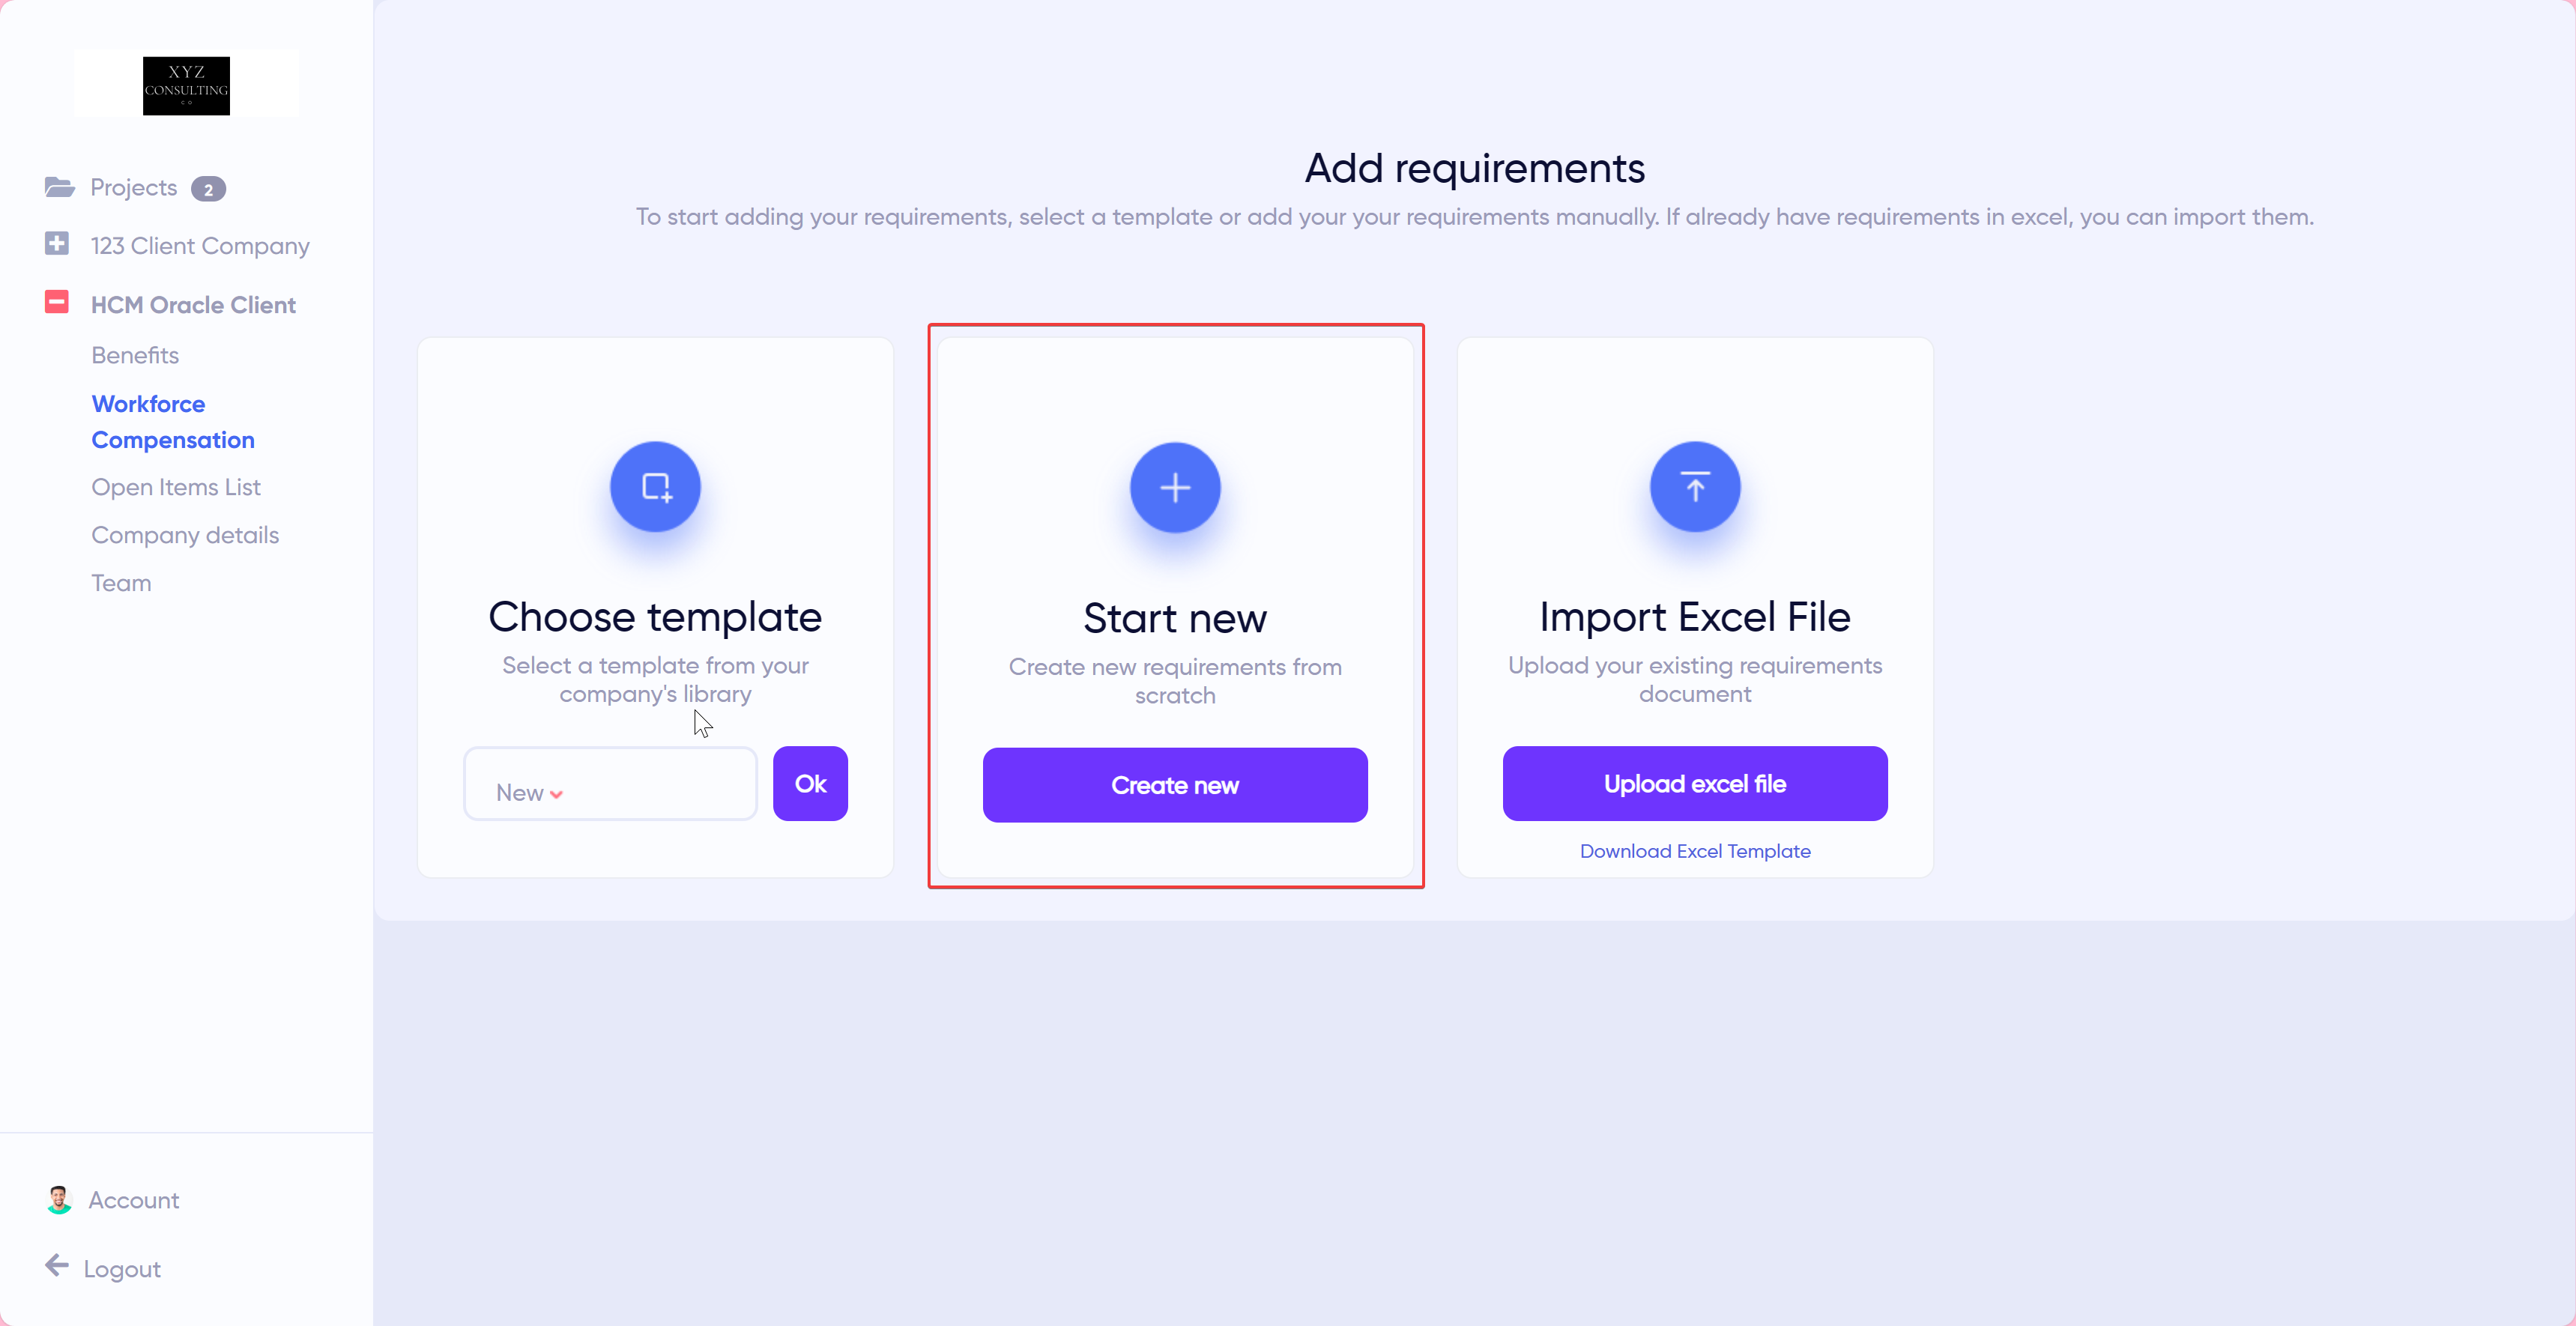
Alternatively, you can directly create requirements. First, click on a module in a project. Next, click the Create New button.
Import Requirements from Excel
This can be done in two ways. The first can be done when creating requirements for a module for the first time. Here are the steps:

Click on a module in a project.
Click Download Excel Template.
Modify the template with requirements data.
Note: Make sure the file has the following fields, namely, fit, description, solution, priority, release, subcategory, and comments.
Click the Upload Excel file button.
In the Tab column, select the appropriate sheet.
Map the imported file fields to the template fields.
Click the Save & Continue button.
Review the requirements.
Click the Submit button.
The second method allows you to import more requirements to a module after requirements have been added. Here are the steps:

Click on a module in a project.
Click on Import Requirements.
Select an Excel file.
Note: Make sure the file has the following fields, namely, fit, description, solution, priority, release, subcategory, and comments.
In the Tab column, select the appropriate sheet.
Map the imported file fields to the template fields.
Click the Save & Continue button.
Review the requirements.
Click the Submit button.
Edit Requirements
To edit requirements means a consultant can add, delete, and modify requirements. A consultant can edit requirements only when it has a “Draft” or “Revising” status. A consultant cannot edit requirements when it has a “Ready for Sign-Off” or “Approved” status.
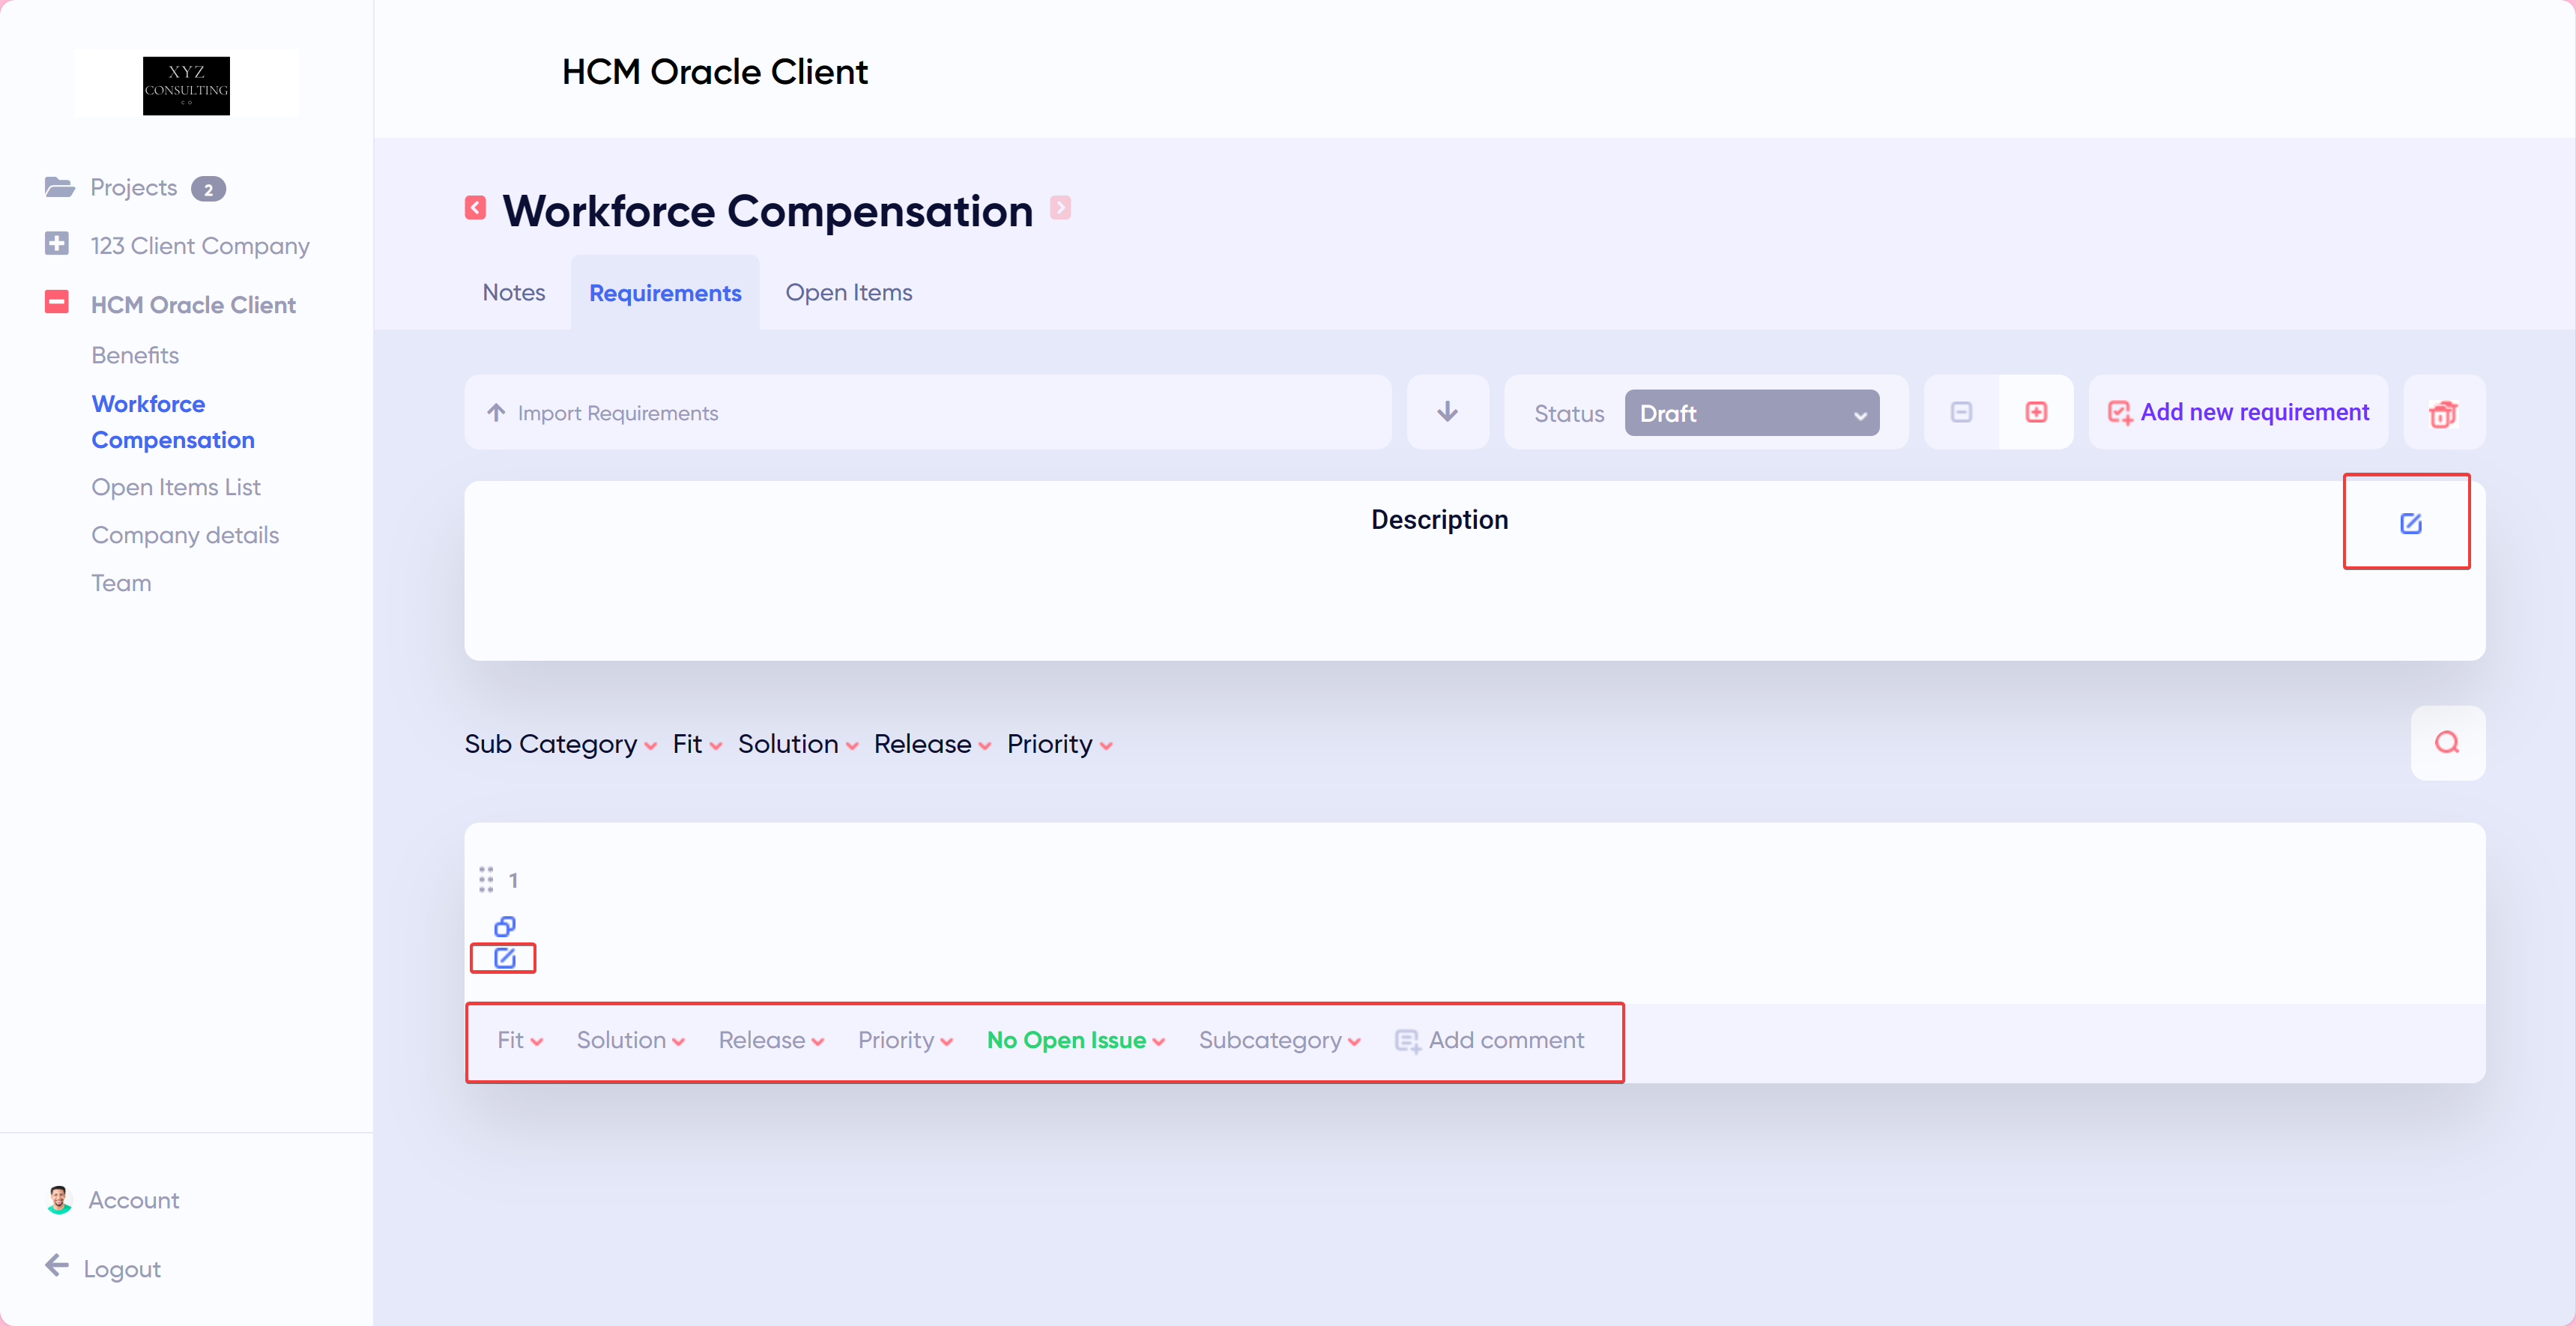
To edit a requirement, a consultant can click the edit icon as shown in the picture below. A consultant can also change the requirement fields, open an issue (open items), or add a comment.
Link Requirement to Open Item
When editing requirements, a consultant can open an issue on each requirement.
Here are the steps to link requirements to an open item:
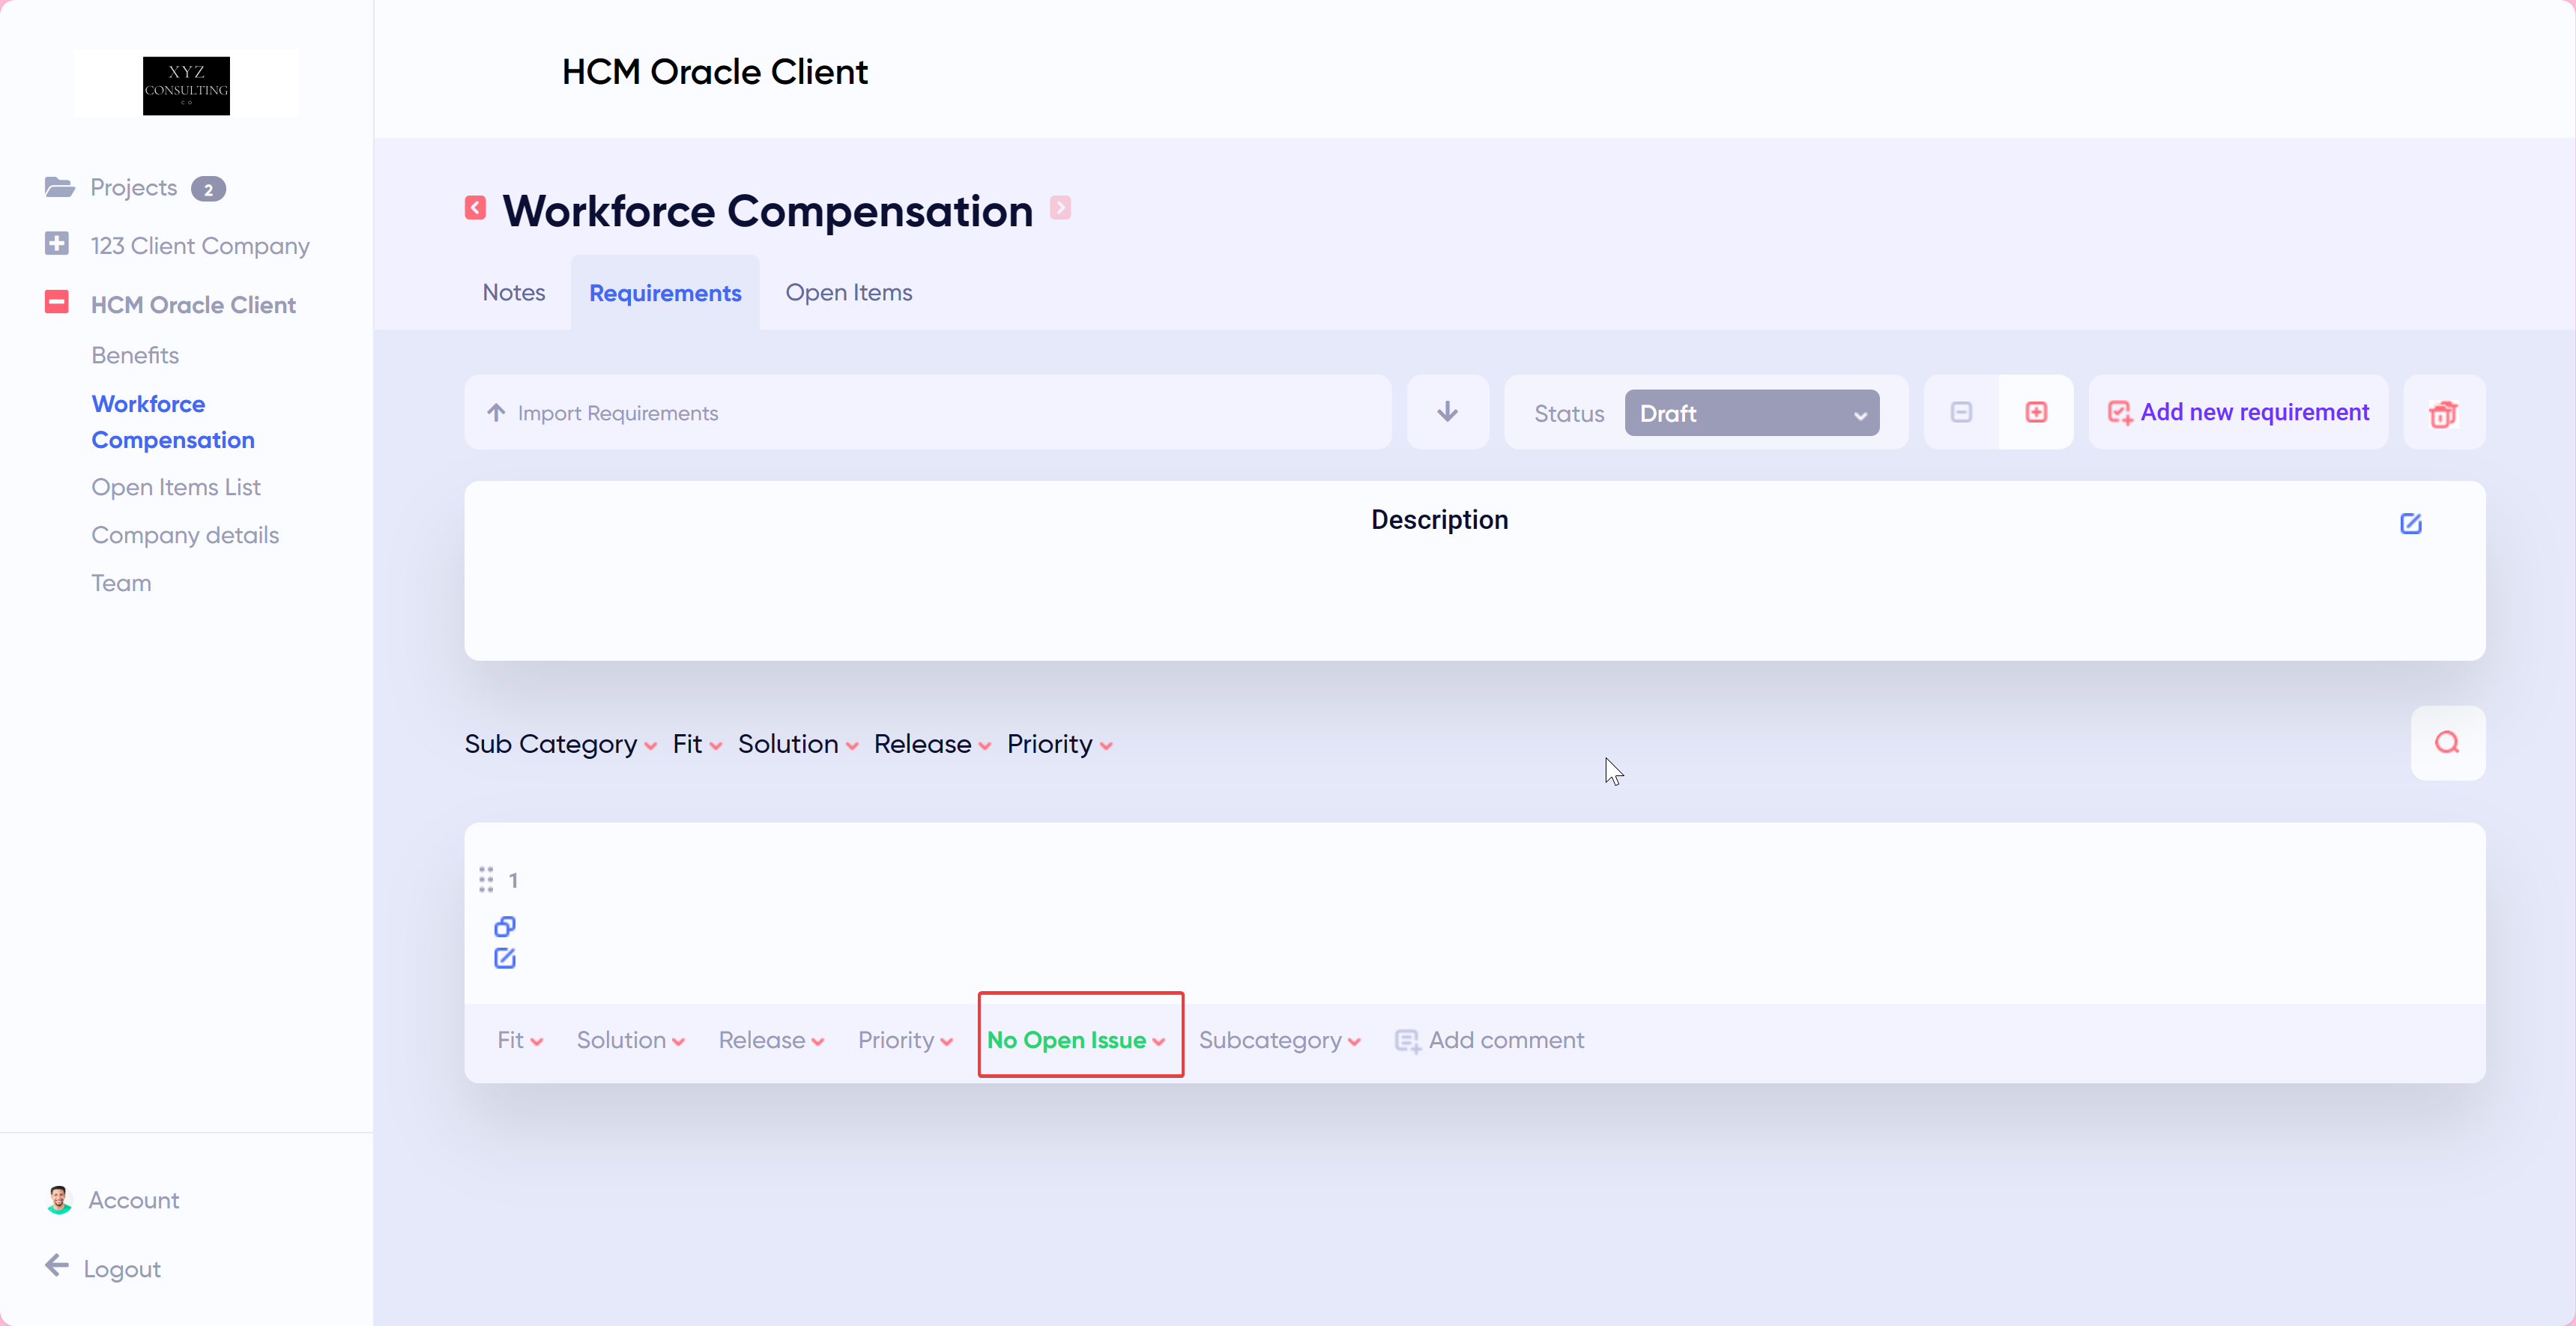
From a requirement, click No Open Issue.
Select Open Issue from the dropdown.
Enter the details of the open item.
Click Create.
Creating and Editing Notes
Notes is a way for the consultant to capture important details about conversations with the client about the project. Notes are usually conversational items that will later become formal requirements or open items.
Create an Open Item from Note
As a consultant, you can create open items from notes.
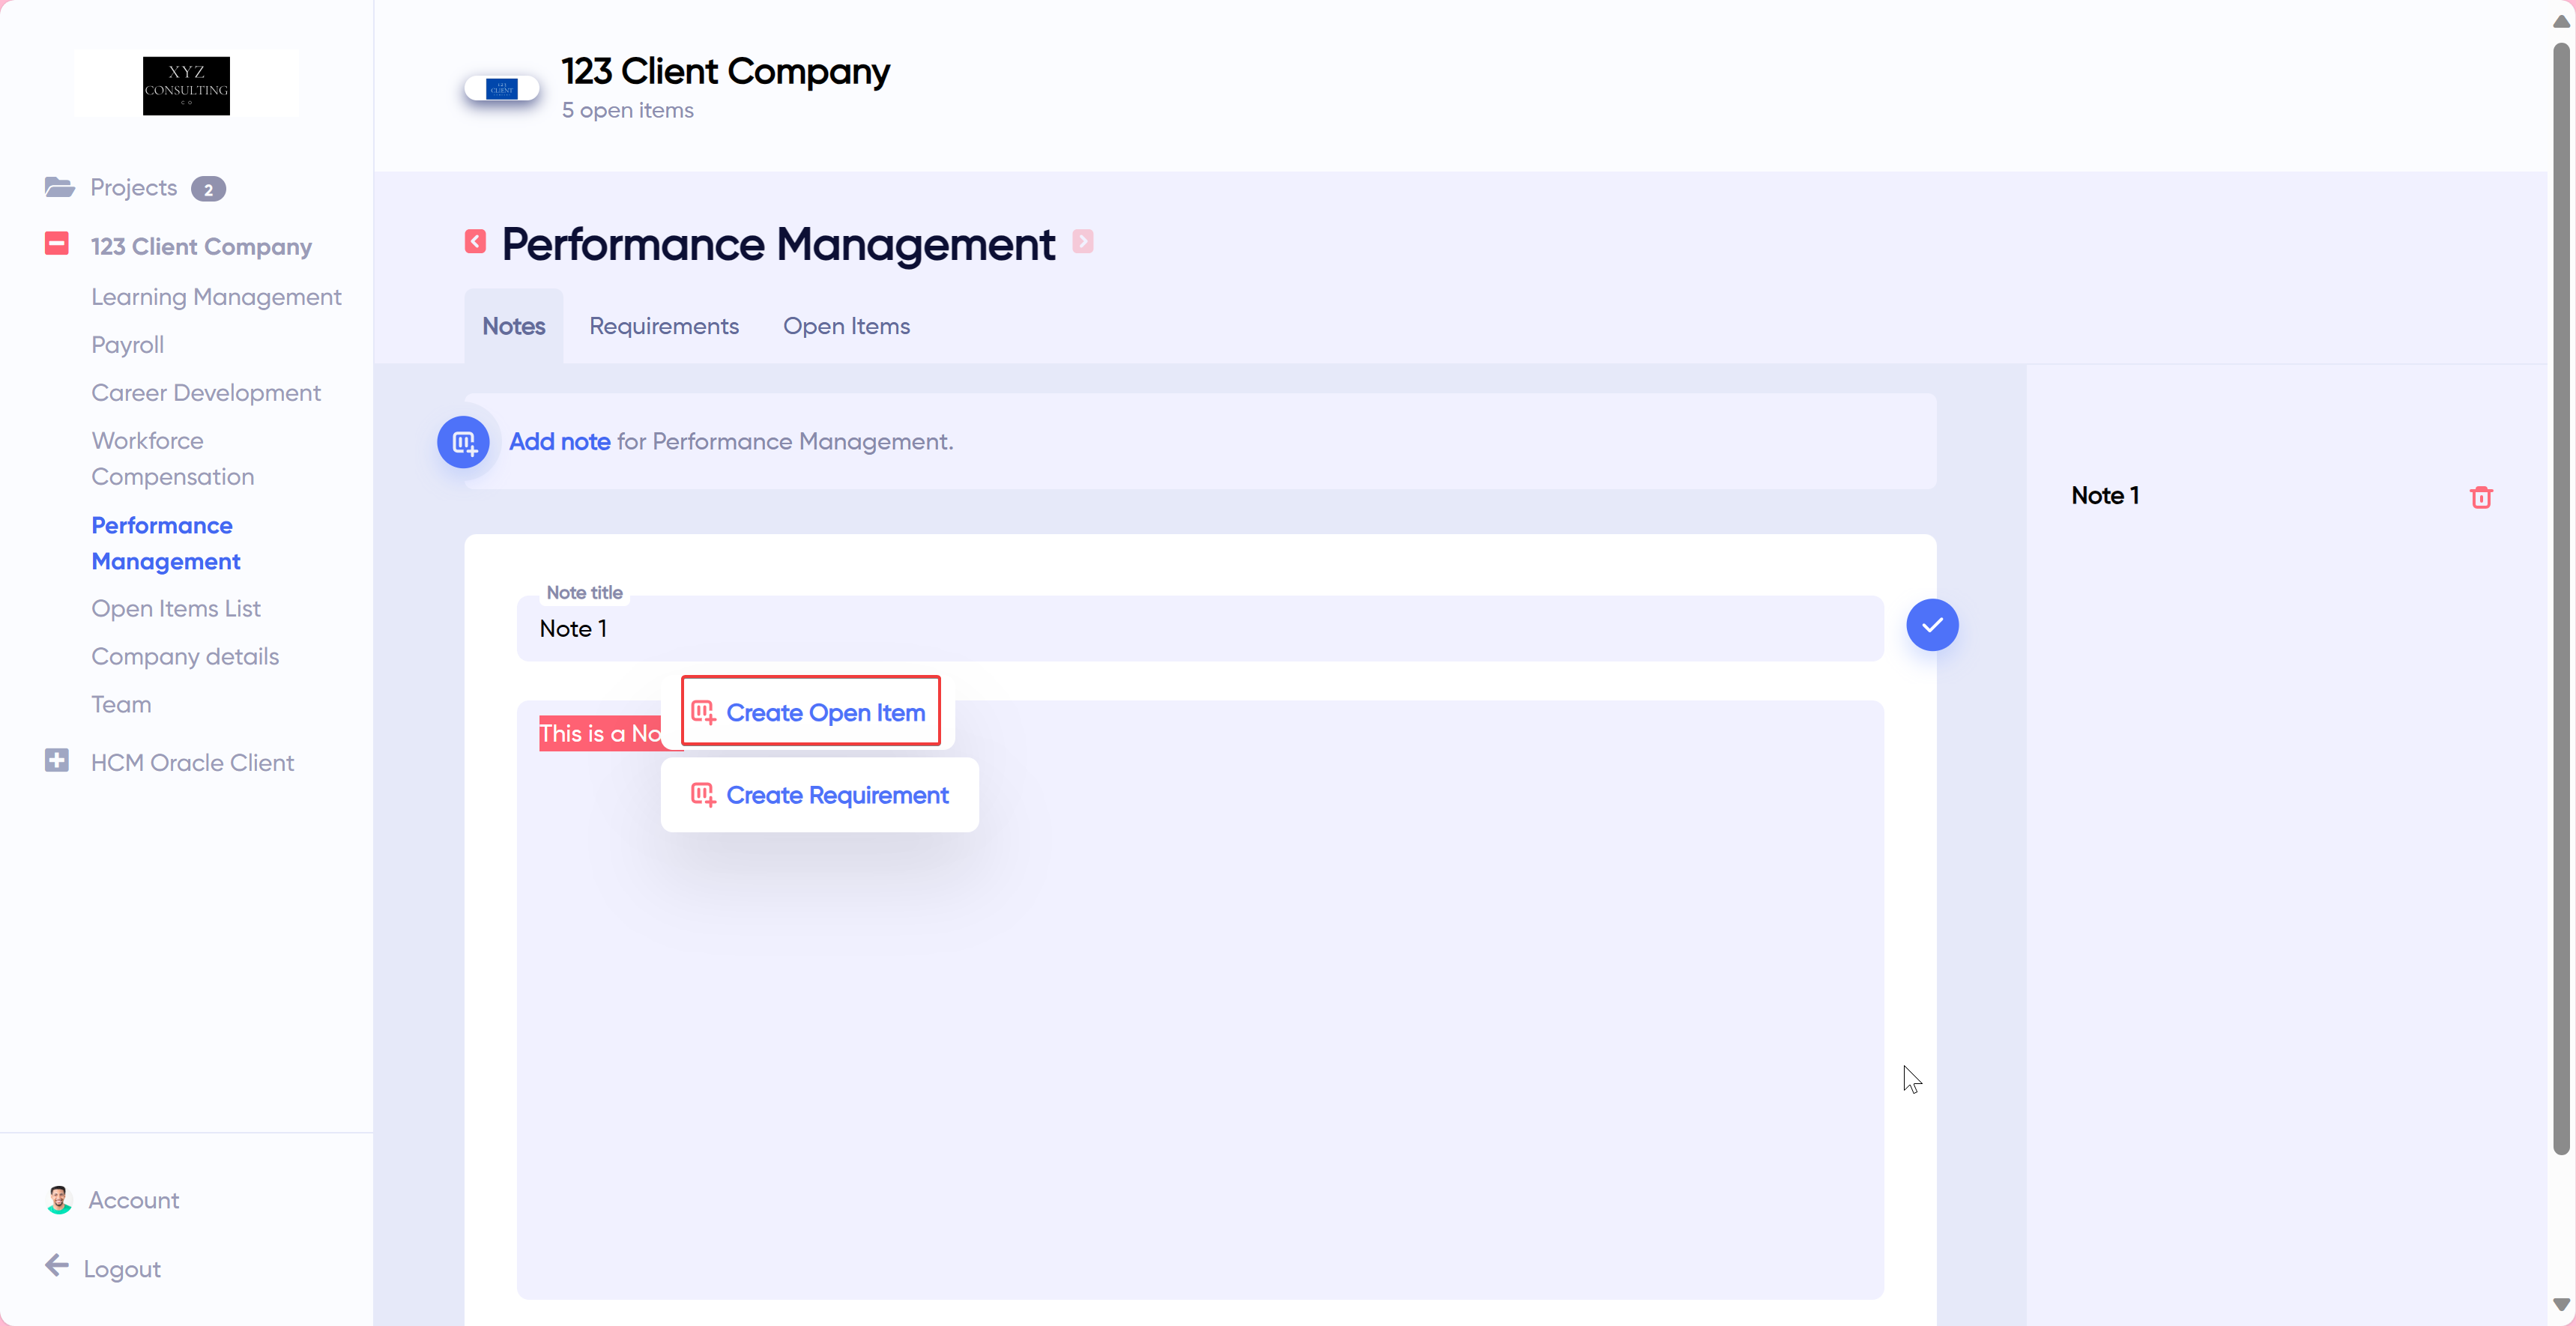
Here are the steps to create open items from notes:
Click on a module in a project.
Click on the Notes menu.
Highlight text from the body of a Note.
Right-click the highlighted text.
Select Create Open Item
Update the details of the Open item.
Note: Refer to the Creating and Editing Open Items section under the Project Manager role for more informationClick Create.
Create Requirement from Note
A consultant can also create requirements from notes.
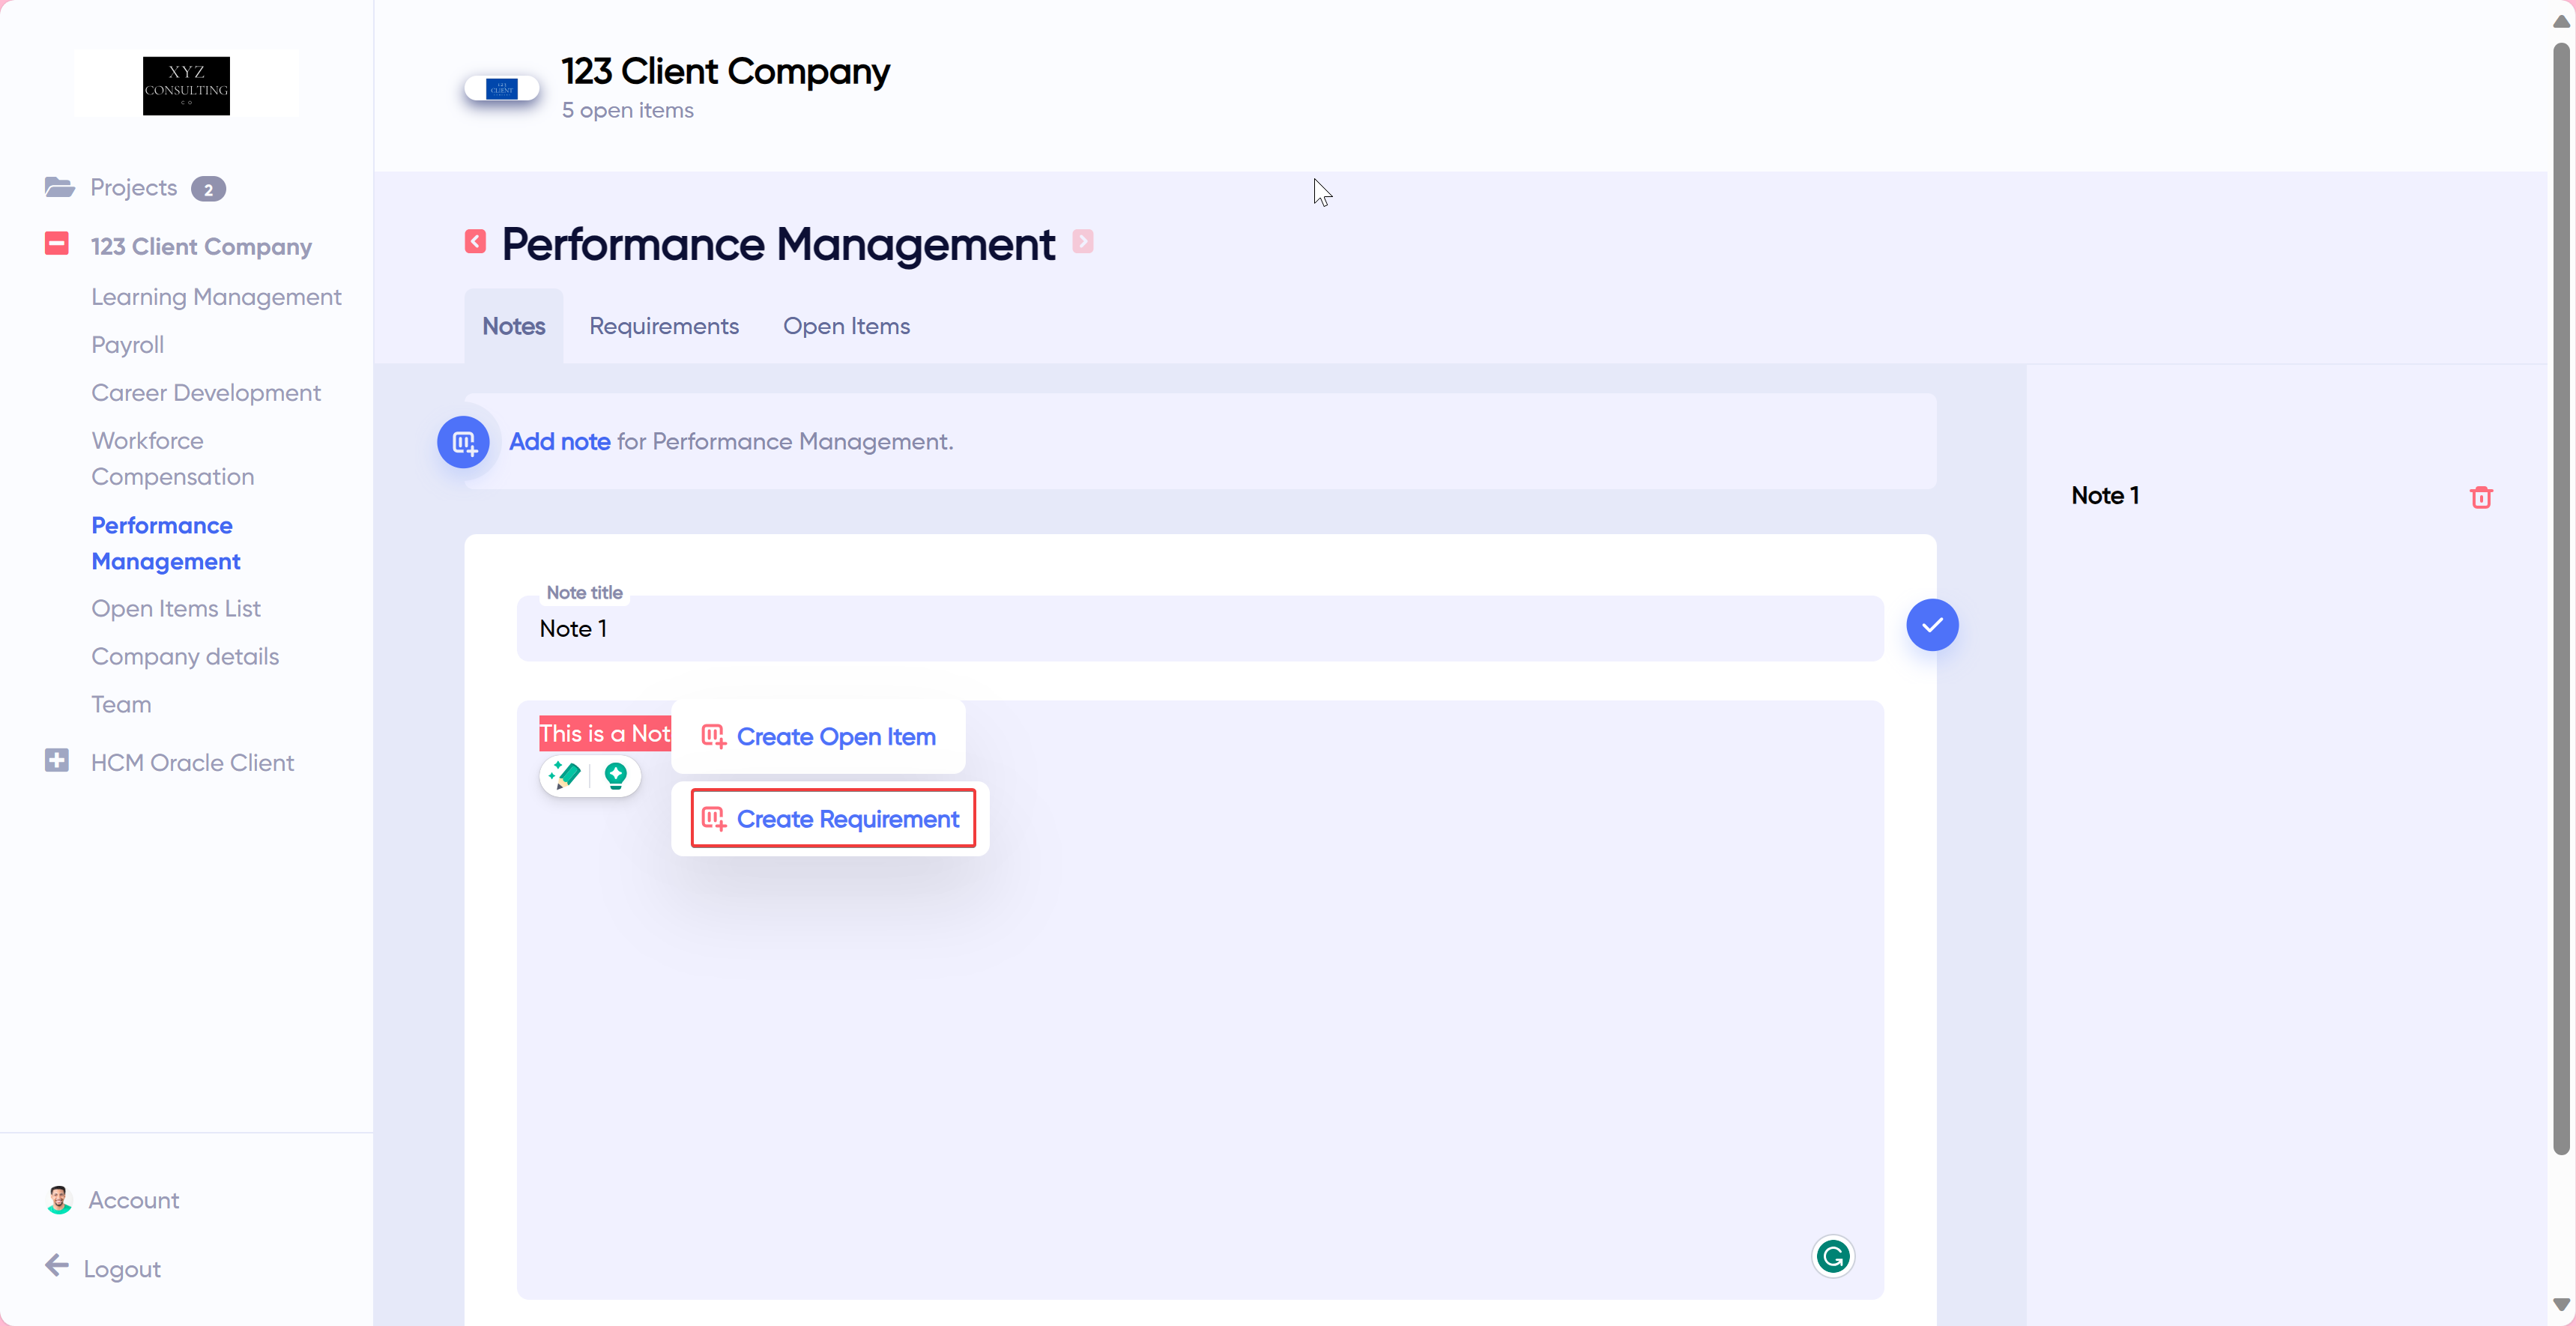
Here are the steps to create requirements from notes:
Click on a module in a project.
Click on the Notes menu.
Highlight text from the body of a Note.
Right-click the highlighted text using a mouse or touchpad.
Select Create Requirement
Update the requirement field labels.
Click Create.
Creating and Editing Open Items
Open Items is a way to track action items that need to be done in a project. You can view all open items of a project by clicking Open Items List as shown in the image below.
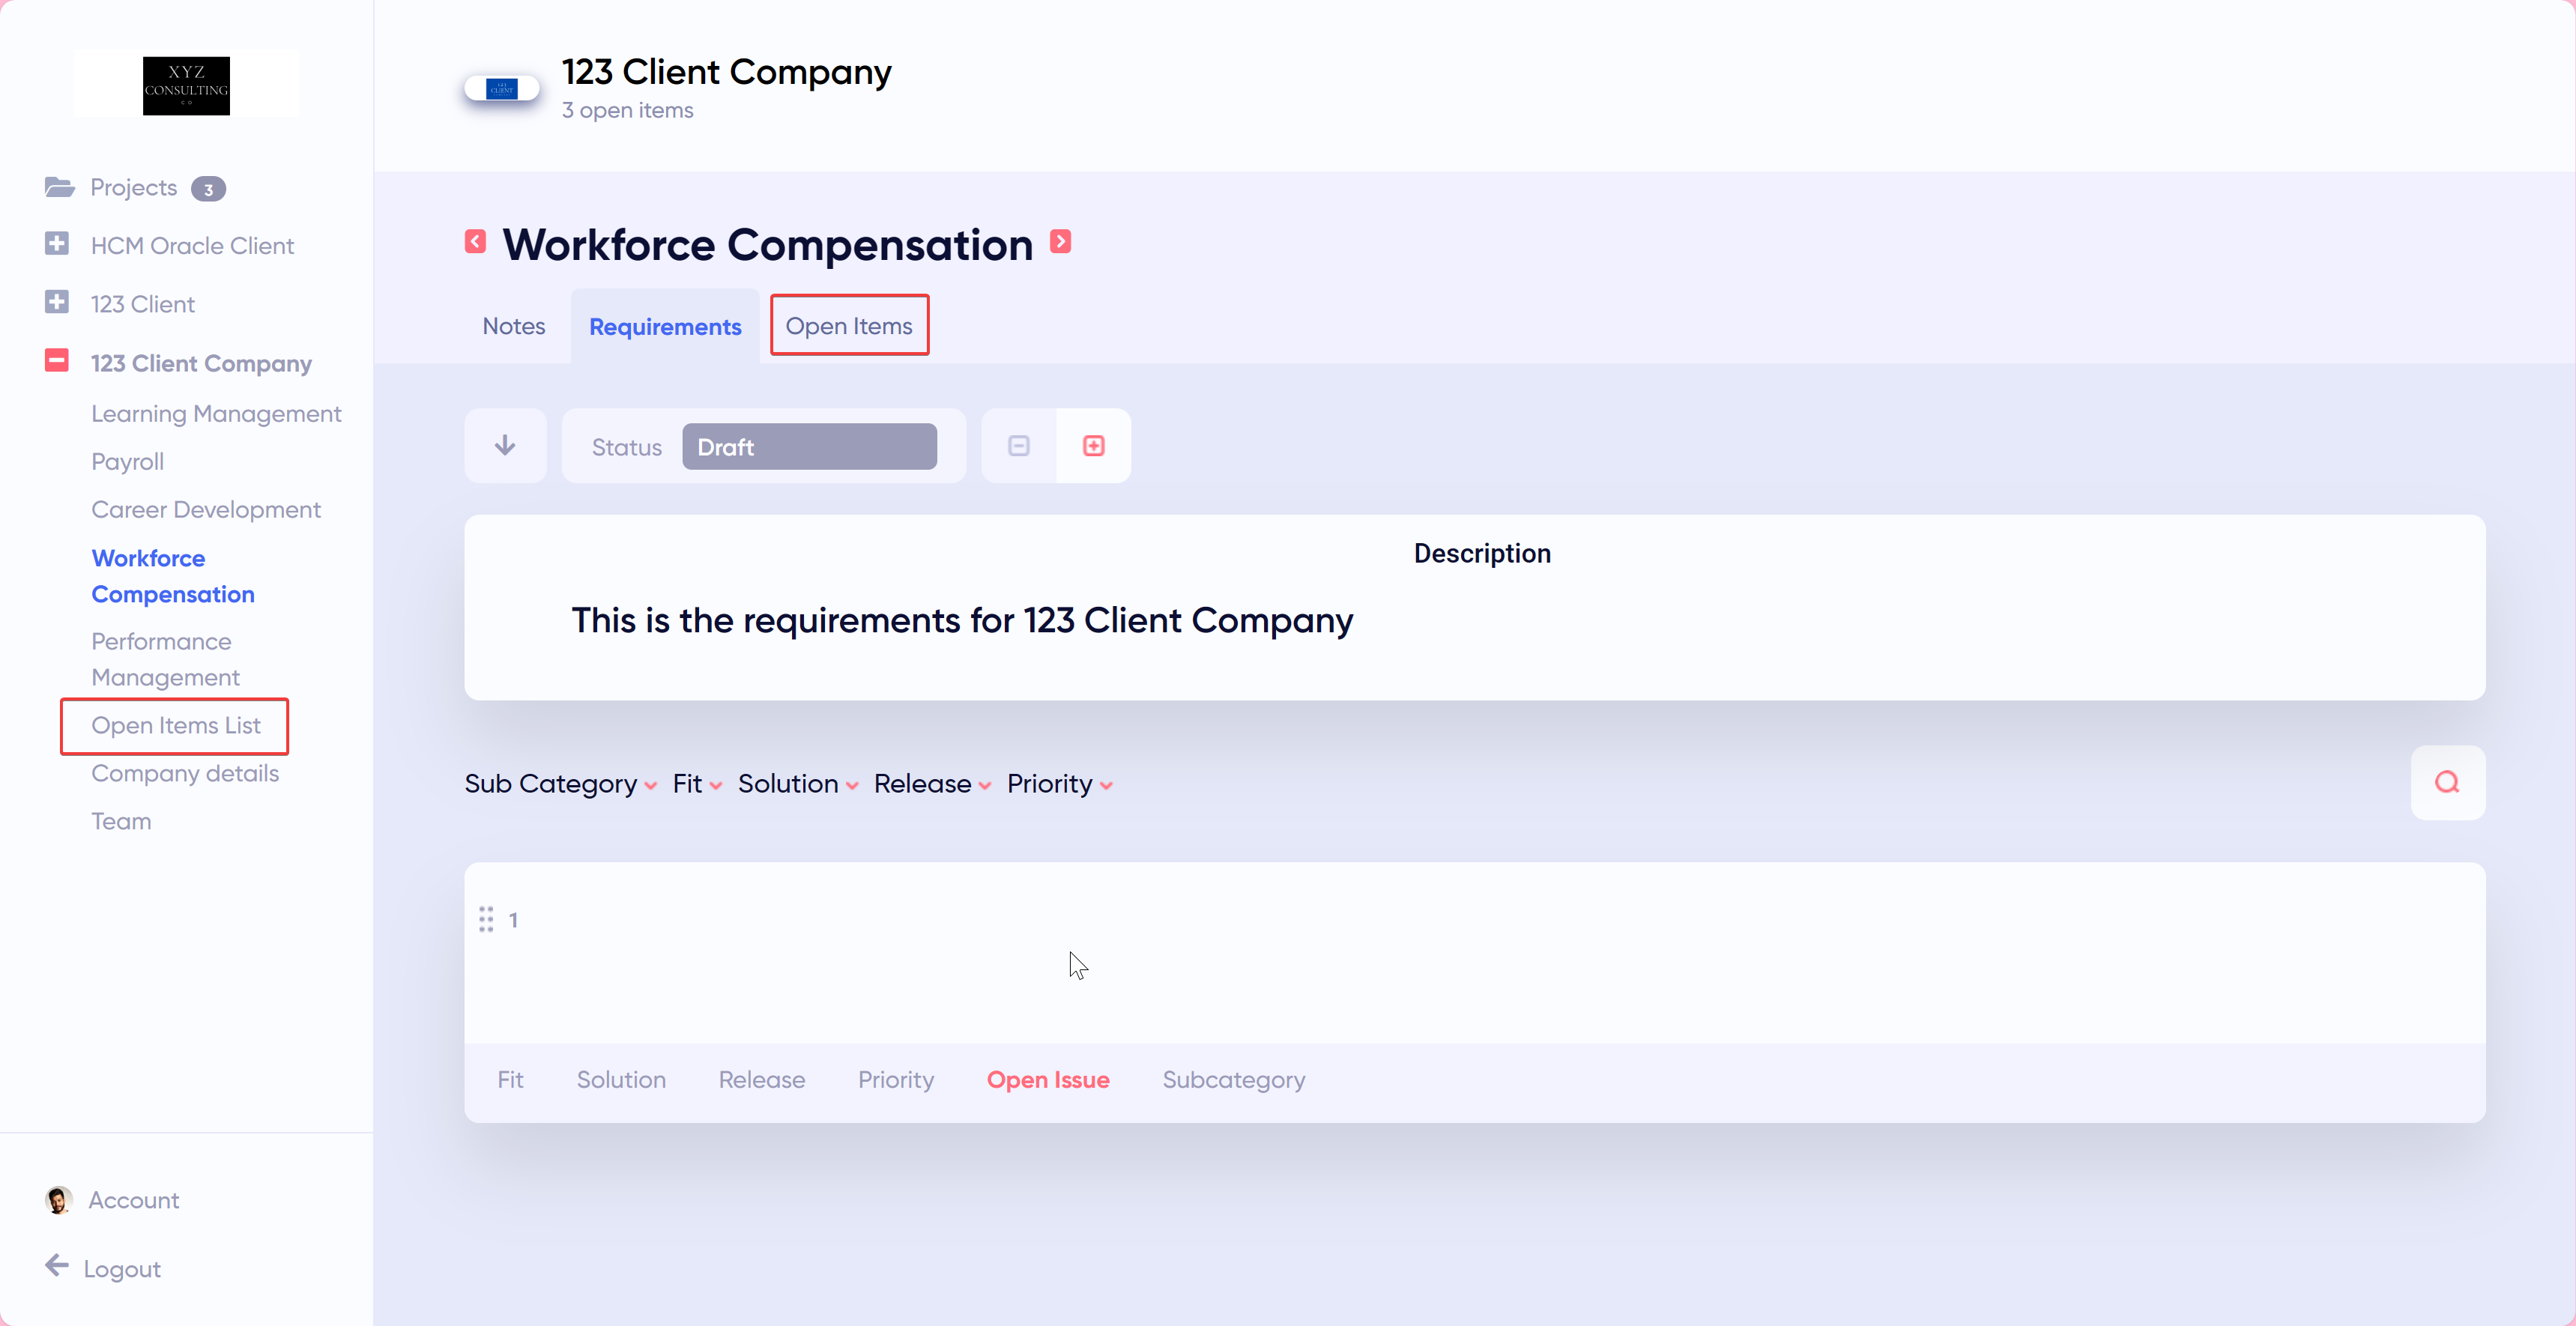
For more details on how to create and edit Open items, refer to the Creating and Editing Open Items section under the Project Manager role.
Link Open Item to Requirement
This allows a consultant to attach a requirement to the open item. To attach a requirement to an open item, the open item must be created first. You must also select a module for the open item to link a requirement.

Here are the steps:
On the Open Item, click Linked Requirement on the bottom–left.
Select a requirement from the dropdown.
Note: You can search requirements from the dropdown using their tags. For instance, Career Development #4.
Was this article helpful?
That’s Great!
Thank you for your feedback
Sorry! We couldn't be helpful
Thank you for your feedback
Feedback sent
We appreciate your effort and will try to fix the article